August 27, 2026
How to Convert HEIC to JPG Online Without Losing Quality
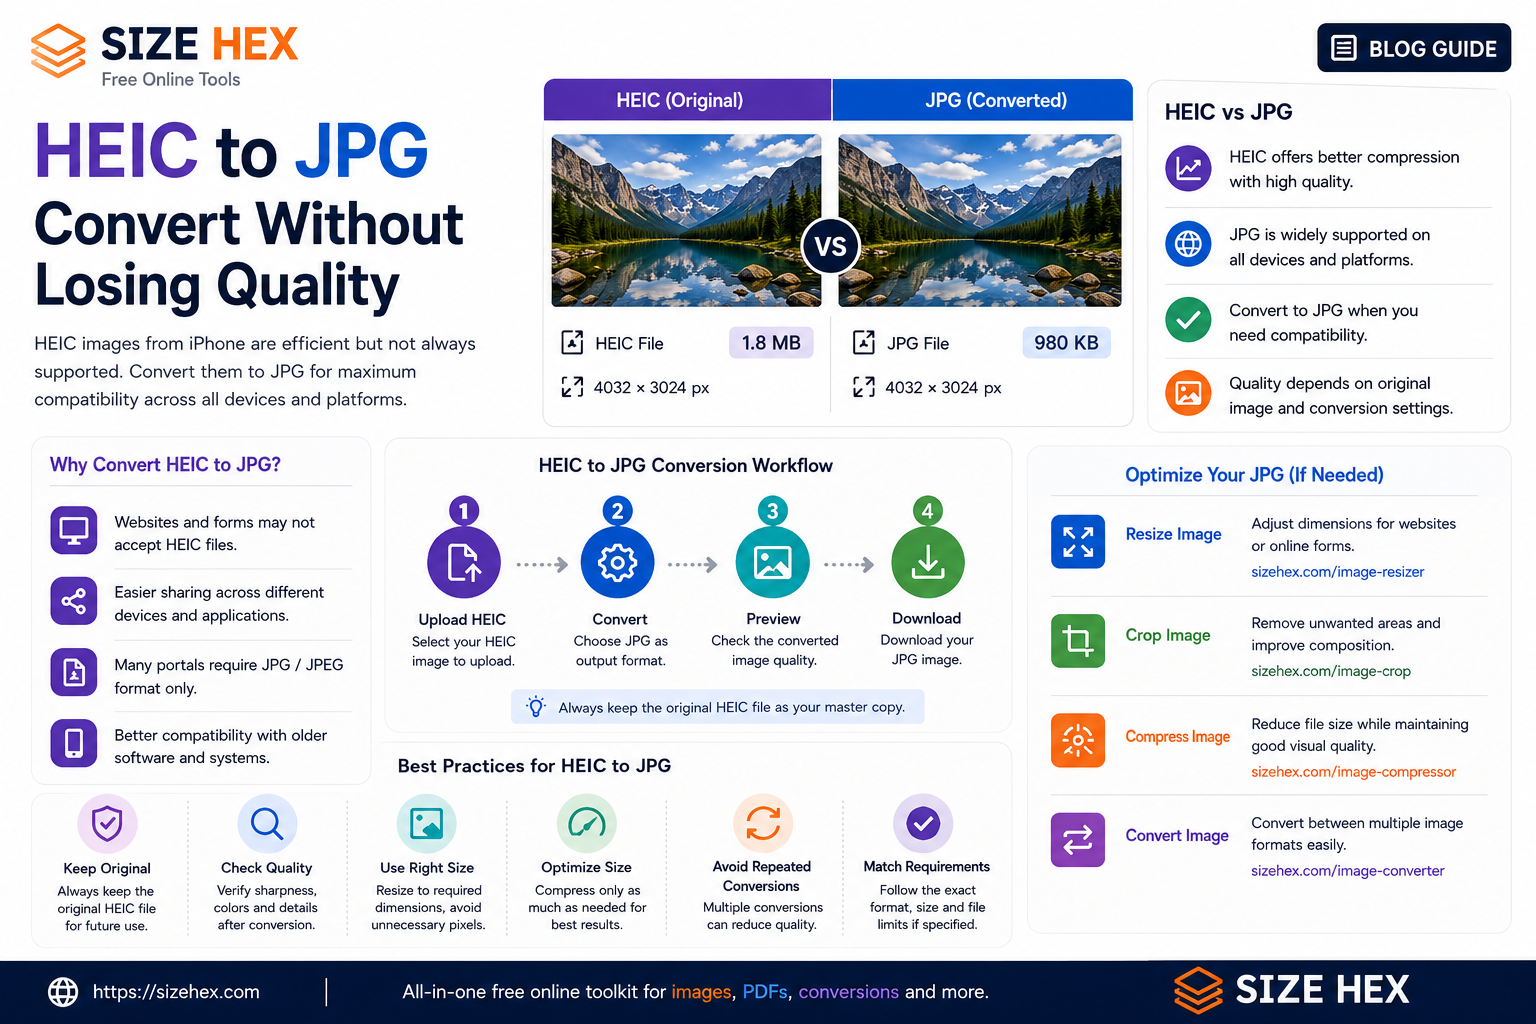
How to Convert HEIC to JPG Online Without Losing Quality
If you've ever transferred photos from an iPhone to a Windows computer, uploaded an image to an online form, or tried opening a photo in an older application, you may have encountered a file ending in .HEIC.
HEIC is commonly used by Apple devices because it can store high-quality photographs efficiently. However, not every website, application, or device handles HEIC files as easily as JPG.
When compatibility becomes a problem, converting the image from HEIC to JPG can be a practical solution.
In this guide, we'll explain what HEIC is, why you may need to convert it to JPG, how the conversion works, and how to maintain good image quality during the process.
What Is a HEIC Image?
HEIC stands for High Efficiency Image Container.
It is an image container format associated with Apple's use of the High Efficiency Image File Format (HEIF) for photos on supported devices.
HEIC can provide high image quality while using efficient storage compared with some traditional image formats.
This makes it useful for smartphones where storage space matters.
However, the main issue isn't necessarily image quality.
The problem is compatibility.
Some websites, applications, upload systems, and older software may not accept HEIC files.
That's where converting HEIC to JPG becomes useful.
Why Convert HEIC to JPG?
JPG is one of the most widely supported image formats.
You may want to convert a HEIC image to JPG when:
- A website doesn't accept HEIC files
- An online form requires JPG or JPEG
- You need to send the image to someone using older software
- A document system only supports common image formats
- You want easier compatibility across different devices
- You need to use the image in software that doesn't support HEIC
For example, if an online application only provides an upload field for JPG or JPEG images, a HEIC photograph from an iPhone may not be accepted.
Converting the image first can solve the compatibility problem without requiring you to retake the photograph.
HEIC vs JPG: What's the Difference?
HEIC and JPG use different approaches to storing image information.
HEIC is designed for efficient storage and can preserve high-quality images in relatively compact files.
JPG is an older and extremely widely supported format that uses lossy compression.
The most important practical difference for many users is:
HEIC = efficient modern image storage
JPG = broad compatibility
Neither format is automatically better for every situation.
If you're keeping photos on a compatible device, HEIC can be perfectly suitable.
If you need to upload, share, edit, or open the image across a wider range of systems, JPG can be more convenient.
Can You Convert HEIC to JPG Without Losing Quality?
Conversion always involves processing the original image, so it's better to think in terms of preserving as much useful visual quality as possible rather than promising zero quality change in every situation.
The final result depends on factors such as:
- Original HEIC image
- Output JPG quality
- Image dimensions
- Compression settings
- Conversion software
- Whether the image is converted repeatedly
For the best result, convert directly from the original HEIC file rather than converting an already compressed JPG back and forth between formats.
When Should You Convert HEIC to JPG?
You don't necessarily need to convert every HEIC image.
Keep the original HEIC when:
- Your devices support it
- Your photo library uses HEIC
- You don't need compatibility with older applications
- Storage efficiency is important
Convert to JPG when:
- A website doesn't accept HEIC
- An online form specifically requires JPG
- You need broader compatibility
- You are sharing the image with someone whose software doesn't support HEIC
This approach lets you keep the efficient original while creating a JPG copy whenever compatibility requires it.
Before Converting, Check the Original Image
Before converting a HEIC file, check:
- Original dimensions
- Orientation
- Image quality
- File size
- Whether the image contains important details
Keeping the original file is always a good practice.
You can then create a JPG version specifically for uploading, sharing, or editing while retaining the original HEIC photograph for future use.
How to Convert HEIC to JPG Online
Once you have a HEIC image that needs to be used somewhere that doesn't support the format, converting it to JPG is usually straightforward.
The important part is to convert the original HEIC file directly and then check the resulting JPG before using it.
Step 1: Select the Original HEIC Photo
Start with the original HEIC file from your iPhone, iPad, or another compatible device.
Avoid converting an image that has already been converted multiple times.
Repeated conversions can introduce unnecessary quality loss, especially when lossy formats are involved.
If possible, keep the original HEIC file as your master copy.
Step 2: Use an Online HEIC to JPG Converter
An online converter can create a JPG copy without requiring you to install desktop software.
The basic process is:
- Open the HEIC to JPG conversion tool.
- Select your HEIC image.
- Upload or process the image.
- Select JPG as the output format if required.
- Start the conversion.
- Download the resulting JPG.
For privacy-sensitive photographs, always check how the tool processes your files.
Tools that process images locally inside the browser can avoid sending your photographs to a remote server.
Step 3: Check the Converted JPG
Don't immediately upload the converted file to another website.
Open the JPG first and check:
- Image sharpness
- Colors
- Orientation
- Dimensions
- Important details
- Overall appearance
The converted image should look appropriate for its intended use.
If the image is going to be printed or uploaded to an application, also check whether the final dimensions and file size meet the requirements.
HEIC to JPG for iPhone Photos
HEIC is commonly encountered when photos are taken using Apple devices with High Efficiency image settings.
This can be convenient for storing photographs, but compatibility can become an issue when sharing the files with systems that expect JPG.
For example, imagine taking a passport photograph on an iPhone and later discovering that an online application only accepts:
JPG / JPEG
Instead of taking another photograph, you can create a JPG copy from the original HEIC file and use that version for the application.
Keep the original HEIC image separately.
What Happens to Image Dimensions During Conversion?
A format conversion doesn't necessarily mean that the image needs to be resized.
If your original HEIC image is 4032 × 3024 pixels, a direct conversion can preserve those dimensions in the resulting JPG.
However, that doesn't mean the resulting image is always the ideal size for your particular use.
If the website or application requires specific dimensions, you may need to resize the JPG after conversion.
For exact pixel dimensions, you can use the SizeHex Image Resizer.
A useful workflow is:
HEIC → JPG → Resize if required → Compress if required
HEIC to JPG for Online Forms
Many online forms specify strict requirements for uploaded photographs.
For example, a portal might require:
- JPG or JPEG format
- Specific width and height
- Maximum file size
- Minimum image dimensions
In this situation, simply converting HEIC to JPG may not be enough.
You may need to prepare the image through multiple steps.
Recommended workflow
1. Convert HEIC to JPG
Create a compatible JPG version.
2. Crop if necessary
Remove unwanted areas or match the required composition.
You can use the SizeHex Image Crop Tool for this step.
3. Resize
Set the exact pixel dimensions required by the form.
Use the SizeHex Image Resizer.
4. Compress
If the portal has a maximum file-size requirement, reduce the JPG accordingly.
The SizeHex Image Compressor can be used for this step.
5. Check the final file
Confirm the format, dimensions, file size, and visual quality before uploading.
Does Converting HEIC to JPG Reduce File Size?
It can, but there is no guaranteed file-size reduction.
HEIC is already designed to be efficient, so converting it to JPG may sometimes result in a similar or even larger file.
The final JPG size depends on:
- Original image
- JPG quality
- Image dimensions
- Image content
- Compression settings
- Metadata
Therefore, don't convert HEIC to JPG simply because you expect the file to become smaller.
The main reason to convert is often compatibility.
How to Reduce the Size of a Converted JPG
If the converted JPG is larger than the limit required by a website or application, you can compress it after conversion.
For example:
HEIC → JPG → Compress
This is useful when an application says something like:
Maximum file size: 100KB
or
Upload JPG under 50KB.
The compression level should be chosen carefully so that the photograph remains clear enough for its intended purpose.
Don't Repeatedly Convert the Same Image
Avoid workflows such as:
HEIC → JPG → HEIC → JPG → JPG
Every unnecessary conversion adds another processing step.
Instead, keep the original HEIC file and create a fresh JPG whenever you need one.
This gives you a cleaner source for future conversions and helps avoid unnecessary quality degradation.
Related SizeHex Tools
Once your HEIC image has been converted to JPG, you may need additional preparation.
Resize the image:
SizeHex Image Resizer
Compress the JPG:
SizeHex Image Compressor
Crop the photo:
SizeHex Image Crop Tool
Convert between supported image formats:
SizeHex Image Converter
The best tool depends on what you need to do after conversion.
A Simple HEIC-to-JPG Workflow
Original HEIC photo
↓
Convert to JPG
↓
Crop if necessary
↓
Resize if required
↓
Compress if required
↓
Check quality + dimensions + file size
↓
Upload or share
This workflow is especially useful when preparing iPhone photographs for websites, online applications, documents, or platforms that don't accept HEIC files.
HEIC to JPG: Best Practices for Quality, File Size and Online Uploads
Converting HEIC to JPG solves the compatibility problem, but the conversion itself is only one part of preparing an image.
Depending on where you plan to use the JPG, you may also need to crop, resize, compress, or optimize the image before uploading it.
The best workflow depends on the requirements of the website, application, or platform where the image will be used.
Check the JPG After Conversion
After converting a HEIC image to JPG, always inspect the final file.
Pay attention to:
- Image sharpness
- Colors
- Orientation
- Important details
- Pixel dimensions
- File size
A successful conversion should produce a JPG that is suitable for your intended purpose.
Don't judge the result only by its filename or file extension. Open the actual JPG and verify that it looks correct.
Keep the Original HEIC File
One of the best practices when working with HEIC images is to keep the original file.
Instead of replacing your original photograph with the converted JPG, keep both versions:
Original HEIC → Master copy
JPG → Sharing, uploading, or compatibility copy
This gives you flexibility later.
You may need a different JPG size, a WebP version, or a compressed image for another website.
Starting from the original HEIC file gives you more control over those future versions.
Crop Before Final Optimization
If the photograph contains unnecessary background or empty space, crop it before creating the final optimized version.
For example, a portrait may contain a large amount of unused space around the subject.
Removing that unnecessary area can create a more suitable composition.
You can use the SizeHex Image Crop Tool to crop the image before further processing.
A practical workflow is:
HEIC → JPG → Crop → Resize → Compress
Not every image needs all of these steps, but they can be useful when preparing a photograph for a specific requirement.
Resize the JPG When Necessary
Converting an image to JPG does not automatically make its dimensions appropriate.
For example, an iPhone photograph may have thousands of pixels in both width and height.
If an online form only requires a much smaller image, delivering the original dimensions may be unnecessary.
After conversion, check the required width and height.
If exact dimensions are required, use the SizeHex Image Resizer.
For example:
Original: 4032 × 3024 pixels
Required: 1200 × 900 pixels
In this situation, resizing the image can substantially reduce the number of pixels that need to be stored and processed.
Compress the JPG When a File-Size Limit Exists
Some websites and online applications impose strict file-size limits.
You may encounter requirements such as:
- JPG only
- Maximum 100KB
- Maximum 200KB
- Maximum 500KB
- Specific dimensions
In these cases, converting HEIC to JPG is only the first step.
You may need to compress the resulting JPG to meet the file-size requirement.
The SizeHex Image Compressor can be used to reduce the file size while maintaining an appropriate level of image quality.
Don't compress more than necessary.
A photograph that technically meets a file-size limit isn't useful if important details become difficult to see.
How to Prepare an iPhone Photo for an Online Form
Suppose you have a photograph stored as HEIC on your iPhone and an online application requires a JPG below a specific file-size limit.
A practical workflow would be:
Step 1 — Convert HEIC to JPG
Create a JPG copy from the original HEIC photograph.
Step 2 — Check the Composition
If the application requires a particular photo composition, crop the image appropriately.
Step 3 — Resize
Set the required pixel dimensions.
Step 4 — Compress
Reduce the JPG until it meets the application's maximum file-size requirement.
Step 5 — Verify Everything
Before uploading, check:
Format + Dimensions + File Size + Image Quality
Step 6 — Upload
Use the final JPG version for the application while keeping your original HEIC file.
This workflow can prevent common upload errors caused by unsupported formats, oversized dimensions, or excessive file size.
HEIC to JPG vs JPG Compression
Conversion and compression are two different operations.
Conversion changes the image format.
Compression reduces the amount of data stored in the resulting file.
For example:
HEIC → JPG
solves a compatibility problem.
While:
JPG → Compressed JPG
helps reduce file size.
If you need both, the workflow can be:
HEIC → JPG → Resize → Compress
Understanding this difference makes it easier to troubleshoot upload requirements.
Avoid Multiple Conversions
Avoid repeatedly converting the same photograph between formats.
For example:
HEIC → JPG → WebP → JPG → JPG
is unnecessary in most situations.
Instead, keep your original HEIC file and create the final format you actually need.
If you need another version later, generate it from the original whenever practical.
This keeps your workflow cleaner and reduces unnecessary processing.
When Should You Keep HEIC Instead of Converting?
You don't need to convert every HEIC photograph.
Keeping the original HEIC can make sense when:
- Your devices support HEIC
- Your photo library already uses HEIC
- You want efficient photo storage
- The destination accepts HEIC
- You want to preserve the original source file
Convert to JPG when compatibility is the actual requirement.
This avoids unnecessary conversions and lets you maintain the original image in its native format.
Related SizeHex Tools
After converting HEIC to JPG, you may need to perform additional image preparation.
Convert HEIC to JPG:
SizeHex HEIC to JPG Converter
Resize the image:
SizeHex Image Resizer
Compress the JPG:
SizeHex Image Compressor
Crop the photograph:
SizeHex Image Crop Tool
Convert between supported image formats:
SizeHex Image Converter
Using these tools together can help prepare an image for different websites, online forms, documents, and sharing platforms.
Final HEIC to JPG Checklist
Before uploading your converted image, check the following:
- Is the file actually in JPG or JPEG format?
- Are the dimensions correct?
- Is the file size within the required limit?
- Is the image still sharp enough?
- Is the orientation correct?
- Are important parts of the photograph visible?
- Did you keep the original HEIC file?
- Have you avoided unnecessary repeated conversions?
If everything looks correct, the JPG should be ready for its intended use.
Conclusion
HEIC is a useful format for storing photographs efficiently, but compatibility can become a problem when a website or application only accepts JPG.
Converting HEIC to JPG provides a practical way to make those photographs usable across a wider range of platforms.
For the best results, don't stop at conversion when additional requirements apply.
Use the complete workflow:
Convert → Crop if necessary → Resize → Compress if necessary → Check → Upload
Most importantly, keep the original HEIC photograph and create optimized JPG copies whenever you need them.
That gives you a flexible workflow for preparing iPhone and other HEIC photographs for websites, online forms, document systems, and everyday sharing.