September 1, 2026
How to Reduce Image File Size on iPhone Without Losing Quality
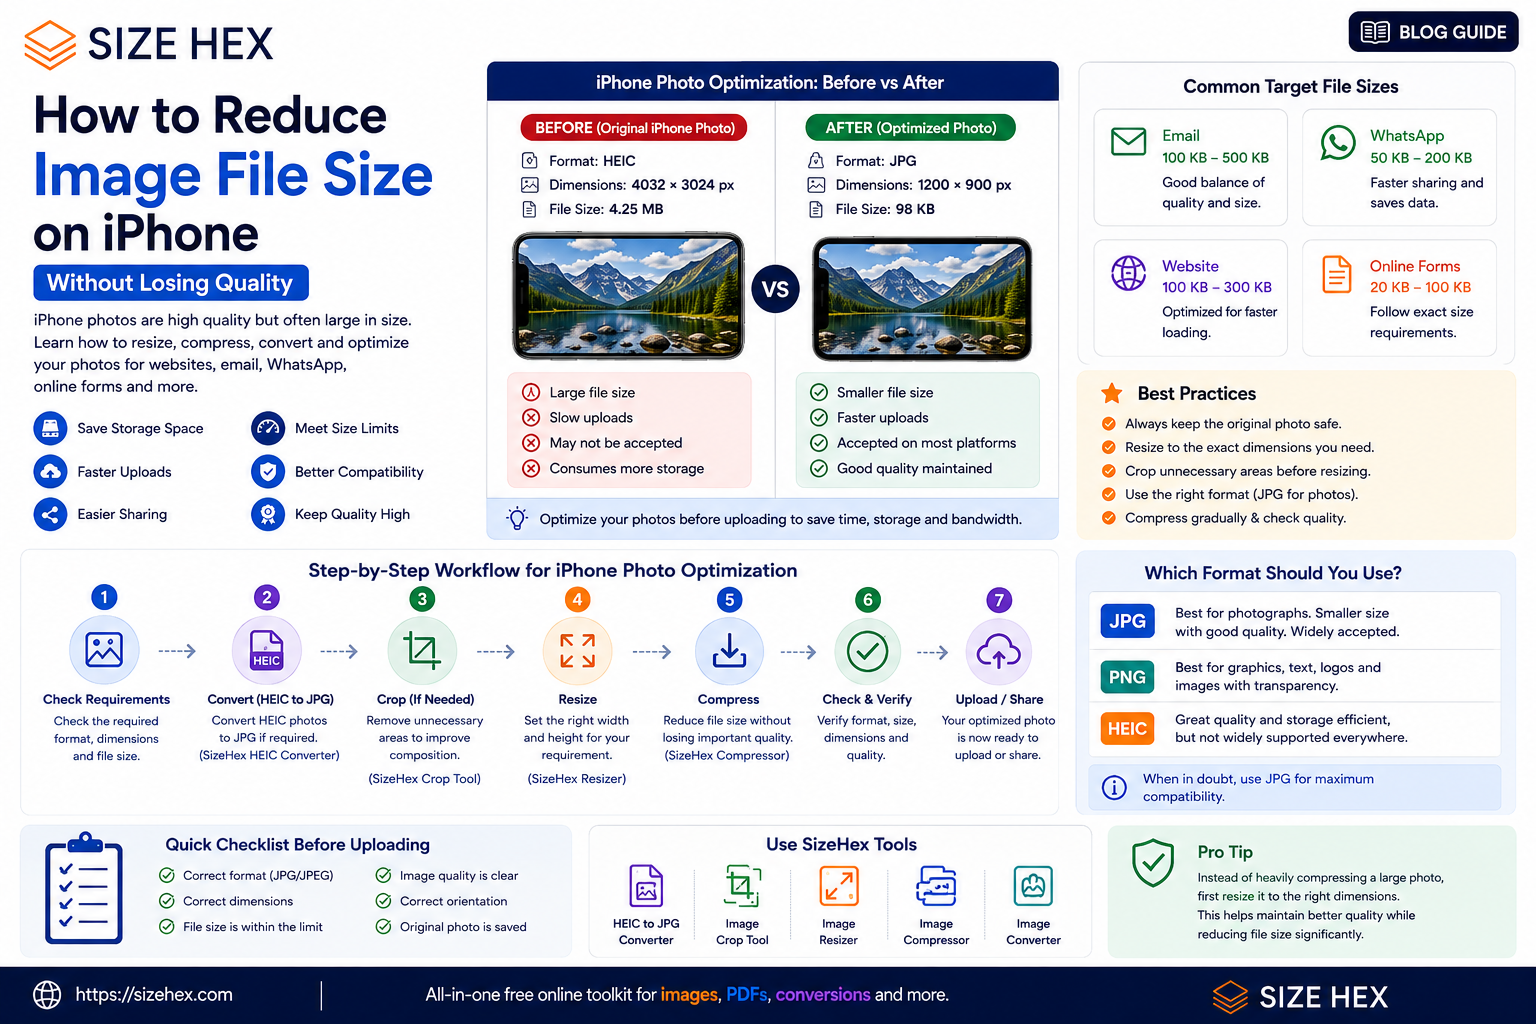
How to Reduce Image File Size on iPhone Without Losing Quality
iPhones capture high-quality photographs, but that quality can sometimes come with a surprisingly large file size.
A single photograph may contain thousands of pixels and take up several megabytes of storage. While that is useful when you want the original image for editing or printing, it can become inconvenient when you need to upload the photograph to a website, attach it to an email, send it through a messaging application, or submit it to an online form.
You may encounter requirements such as:
- Maximum 50KB
- Maximum 100KB
- Maximum 200KB
- JPG or JPEG only
- Specific width and height
- Smaller images for faster uploads
Simply taking a screenshot or repeatedly saving the image isn't an ideal solution.
A better approach is to create an optimized copy of the original photograph by choosing appropriate dimensions, format, and compression.
In this guide, you'll learn practical ways to reduce image file size on an iPhone while keeping the image clear and usable.
Why Are iPhone Photos So Large?
Modern iPhones are designed to capture detailed photographs.
Depending on the iPhone model, camera settings, and image format, photographs can contain a large amount of visual information.
There are several factors that influence the final file size:
- Image dimensions
- Camera resolution
- Image format
- Compression
- Metadata
- Scene complexity
- Lighting and texture
A photograph containing a lot of fine detail can require considerably more data than a simple image with large areas of a single color.
This is why two photographs taken with the same phone can have noticeably different file sizes.
HEIC vs JPG on iPhone
Many iPhones use HEIC for photographs because it can store high-quality images efficiently.
However, compatibility can become a problem when a website or application only accepts JPG or JPEG.
For example, you might have:
iPhone Photo → HEIC
but the website requires:
JPG / JPEG
In that situation, converting the photograph to JPG can solve the compatibility problem.
You can use the SizeHex HEIC to JPG Converter to convert an HEIC photograph directly in your browser. SizeHex currently describes the tool as browser-based and says the image isn't uploaded to a remote server. SizeHex
Don't Compress the Original Photograph
One of the most important rules is to keep your original photograph.
Instead of modifying your only copy, create an optimized version.
For example:
Original iPhone Photo
↓
Optimized Copy
↓
Resize / Convert / Compress
↓
Upload or Share
This gives you the freedom to create another version later if you need higher resolution.
You might need the original photograph for printing, editing, social media, or another website.
Resize the Image Before Compressing
If an image is much larger than necessary, resizing it can be one of the most effective ways to reduce the final file size.
For example:
4032 × 3024 px
may be unnecessarily large for a small online form or email attachment.
Instead, you can create a smaller version with dimensions appropriate for the destination.
The general workflow is:
Original → Resize → Compress
SizeHex's Image Resizer allows users to enter exact width and height values and also provides presets for common use cases. SizeHex
Maintain the Correct Aspect Ratio
When resizing an iPhone photograph, avoid stretching it.
For example:
4032 × 3024 → 1600 × 1200
maintains the original 4:3 proportion.
But changing it to something like:
1600 × 1000
without cropping can distort the photograph.
If you need a completely different composition, crop the image first and then resize it.
Crop Unnecessary Areas
Sometimes the problem isn't only the resolution.
Your photograph may contain large areas of background that aren't actually needed.
Cropping those areas can make the image more useful for its intended purpose.
For example, if you're preparing a portrait for an online application, you may need to remove unnecessary background space before resizing.
The SizeHex Image Crop Tool provides aspect-ratio presets such as 1:1, 16:9, 4:5, and 9:16. SizeHex
A practical workflow can therefore be:
Crop → Resize → Compress
Compress the Final Image
After resizing, compress the image if you need to reduce the file size further.
For example:
Original: 4.5 MB
↓
After resizing: 1.2 MB
↓
After compression: 350 KB
The actual result will vary depending on the image.
Don't aim for the smallest possible number.
Instead, find the smallest file that still provides the quality you need.
You can use the SizeHex Image Compressor for this step. The SizeHex homepage currently provides presets including Website, Email, and WhatsApp, which can help simplify common optimization workflows. SizeHex
Different Requirements Need Different Optimization
The correct settings depend on where you're going to use the image.
For Email
Prioritize a reasonable balance between:
Quality + Attachment Size
You generally don't need the full resolution of the original camera photograph.
For WhatsApp
A smaller optimized copy may be more practical when the goal is simply sharing the photograph.
For Websites
Pay more attention to:
- Display dimensions
- Modern image formats
- File size
- Loading performance
SizeHex's own use-case guidance recommends resizing an image to its actual display dimensions and then converting it to an efficient format before uploading it to a website. SizeHex
For Online Forms
The requirements of the specific form should take priority.
If the application says:
JPG, maximum 100KB
then your final file needs to satisfy both requirements.
What If You Need a Photo Under 50KB?
This is a common requirement for government applications, exam forms, job portals, and other online applications.
Simply compressing a high-resolution iPhone photograph may not be enough.
A better workflow is:
HEIC
↓
JPG
↓
Crop if necessary
↓
Resize
↓
Compress
↓
Check final size
If the target is 50KB, don't stop at 51KB.
Make sure the final file is comfortably below the maximum while retaining sufficient visual quality.
Check the Final File Before Uploading
Before submitting an optimized photograph, verify four things:
1. Format
Is it JPG/JPEG if required?
2. Dimensions
Are the width and height correct?
3. File Size
Is it below the required maximum?
4. Quality
Is the photograph still clear enough?
A file can satisfy the size requirement but still be unsuitable if excessive compression makes important details difficult to see.
Best Workflow for iPhone Photos
For most situations, this workflow works well:
iPhone Photo
↓
Check requirements
↓
Convert HEIC → JPG if required
↓
Crop if necessary
↓
Resize to appropriate dimensions
↓
Compress
↓
Check format + dimensions + file size + quality
↓
Upload or share
This approach is much better than repeatedly editing the original photograph.
Related SizeHex Tools
For preparing iPhone photographs, you can use:
- HEIC to JPG Converter — convert iPhone HEIC photographs to JPG.
- Image Crop Tool — crop unnecessary areas.
- Image Resizer — set exact pixel dimensions.
- Image Compressor — reduce the final file size.
- Image Converter — convert between supported image formats.
How to Reduce iPhone Photo Size to 50KB, 100KB or 200KB
Sometimes you don't simply need a smaller photograph—you need the image to meet a specific file-size requirement.
Online applications, government forms, job portals, examination websites, and other upload systems may specify limits such as 50KB, 100KB, 200KB, or 500KB.
If your iPhone photograph is several megabytes, simply converting it to JPG may still leave you with a file that is far too large.
The solution is to optimize the image according to the exact requirement.
How to Reduce an iPhone Photo to 50KB
If an application requires a photograph below 50KB, use a combination of resizing and compression rather than relying on compression alone.
A practical workflow is:
HEIC → JPG → Crop → Resize → Compress → Check
First, convert the HEIC photograph to JPG if the website doesn't accept HEIC.
You can use the SizeHex HEIC to JPG Converter.
Next, crop unnecessary areas and resize the photograph to dimensions appropriate for the application.
Finally, use the SizeHex Image Compressor and adjust the compression until the resulting file is comfortably below 50KB.
For example:
Original: 4.5 MB
After resizing: 700 KB
After compression: 45 KBThe actual result will depend on the photograph.
How to Reduce an iPhone Photo to 100KB
A 100KB requirement gives you slightly more room to preserve image quality.
Start with the same basic workflow:
Convert → Crop → Resize → Compress
If the original image is already reasonably small, you may not need aggressive resizing.
For example:
Original: 2.8 MB
↓
Resize: appropriate application dimensions
↓
Compress: target around 80–95KB
This gives you a little safety margin below a 100KB upload limit.
How to Reduce an iPhone Photo to 200KB
For a 200KB requirement, you can generally be less aggressive with compression.
The priority should be maintaining good visual quality while keeping the file below the required limit.
A practical target might be:
150–190KB
rather than trying to reach exactly 200KB.
Leaving some margin can help avoid upload systems rejecting a file because it is slightly above the stated maximum.
Don't Always Start by Compressing
One common mistake is immediately applying heavy compression to a huge photograph.
Suppose your original iPhone image is:
4032 × 3024 pixels
and you need a 100KB file.
Trying to force the full-resolution image down to 100KB may result in visible quality loss.
Instead, reduce the dimensions first.
For example:
4032 × 3024
↓
1600 × 1200
↓
Compress
This reduces the amount of image data that needs to be compressed.
Use the Required Dimensions When the Form Specifies Them
Some websites provide both a file-size limit and exact dimensions.
For example:
Photo: 200 × 230 pixels
Maximum size: 50KB
Format: JPGIn this situation, don't focus only on the 50KB requirement.
You need to satisfy all three requirements:
Dimensions + Format + File Size
Use the SizeHex Image Resizer to create the required pixel dimensions, then compress the resulting JPG.
Crop Before Resizing When Composition Matters
Suppose your iPhone photograph contains a person with a lot of unnecessary background.
If you resize the entire photograph without cropping, the subject may become unnecessarily small.
Instead:
Original Photo
↓
Crop
↓
Resize
↓
Compress
The SizeHex Image Crop Tool can be used to remove unwanted areas before resizing.
This is particularly useful for passport-style photographs and application forms.
Don't Stretch the Photograph
When changing dimensions, maintain the correct aspect ratio unless the destination specifically requires a different shape.
For example:
4032 × 3024
has a 4:3 aspect ratio.
A proportional resize could be:
1600 × 1200
rather than randomly changing the width and height independently.
If a website requires a different aspect ratio, crop the photograph rather than stretching it.
How to Check Whether Your Image Is Ready
Before uploading your iPhone photograph, check:
File Format
Make sure the website accepts the format you've created.
If it requires JPG, don't upload the original HEIC.
Dimensions
Check the exact pixel dimensions if the website specifies them.
File Size
Confirm that the file is below, not above, the maximum limit.
Quality
Open the final photograph and make sure:
- The face is clear
- Important details are visible
- The image isn't excessively pixelated
- The colors look normal
- The orientation is correct
What If Your Image Is Still Too Large?
If your photograph is still above the required limit, don't immediately choose maximum compression.
Try this order:
1. Reduce unnecessary dimensions
↓
2. Crop unwanted areas
↓
3. Compress gradually
↓
4. Check the result
↓
5. Repeat if necessary
This gives you more control over the final quality.
What If the Image Becomes Blurry?
If the photograph becomes blurry after optimization, you've probably compressed it too aggressively or reduced the dimensions too far.
Go back to the previous version and try:
- Slightly larger dimensions
- Lower compression
- Less cropping
- A better source image
Remember that 50KB is a file-size requirement, not a guarantee of image quality.
The goal is to meet the requirement while retaining as much useful visual detail as possible.
iPhone Photo Optimization for Different Requirements
Requirement Recommended Workflow Under 50KB Convert → Crop → Resize → Compress Under 100KB Convert → Resize → Compress Under 200KB Convert → Resize if needed → Compress Email Resize → Compress Website Resize → Compress/convert Government form Follow exact dimensions + format + size Social sharing Resize → Optimize The exact settings should always be based on the destination's requirements.
Keep Multiple Versions When Necessary
You don't have to maintain only one version of a photograph.
For example:
Original HEIC
→ High-quality archiveJPG 1MB
→ General sharingJPG 200KB
→ EmailJPG 50KB
→ Online applicationThis approach lets you use the appropriate version without repeatedly modifying the original.
A Simple SizeHex Workflow
If you're preparing an iPhone photograph for an online form, the complete workflow can be:
Step 1 — Convert
Convert HEIC to JPG using the SizeHex HEIC to JPG Converter.
Step 2 — Crop
Remove unnecessary background with the SizeHex Image Crop Tool.
Step 3 — Resize
Set the required width and height using the SizeHex Image Resizer.
Step 4 — Compress
Use the SizeHex Image Compressor to reach the required file size.
Step 5 — Verify
Check:
JPG + Dimensions + File Size + Quality
Step 6 — Upload
Use the final optimized copy for the application.
Keep the original HEIC safely stored.
Related SizeHex Tools
These tools can be combined depending on the requirements of the website or application.
The Key Principle
If an iPhone photograph needs to fit a strict file-size limit, don't simply “compress until it fits.”
Instead, optimize it intelligently:
Format → Crop → Dimensions → Compression → Verification
That approach gives you much more control over the final image and helps you meet strict upload requirements without unnecessarily destroying image quality.
iPhone Image Size: Common Problems, Best Practices & Final Checklist
Reducing an iPhone photo to a smaller file size is usually straightforward, but getting the right combination of format, dimensions, file size, and quality is what makes the final image useful.
Whether you're preparing a photo for an online application, email, website, WhatsApp, or another platform, the same basic principle applies:
Don't optimize the image more than the destination requires.
Common Problems When Reducing iPhone Photos
1. The JPG Is Still Too Large
Converting HEIC to JPG doesn't necessarily produce a small file.
For example:
HEIC → JPG
may still result in a photograph that's several hundred kilobytes or even a few megabytes.
If you have a strict size requirement, you'll usually need to resize and/or compress the JPG after conversion.
Use the SizeHex Image Compressor when the file needs additional size reduction.
2. The Image Becomes Too Blurry
If you compress the image too aggressively, important details can disappear.
This is especially noticeable in:
- Faces
- Small text
- Product details
- Screenshots
- Documents
- Fine textures
If the final image looks noticeably blurry, go back to the previous version and use less compression or slightly larger dimensions.
Smaller isn't always better.
3. The Image Has the Wrong Dimensions
Some websites don't only specify a maximum file size.
They may require something like:
Width: 300px
Height: 400px
Maximum file size: 50KBIn that situation, simply creating a JPG below 50KB isn't enough.
The image must satisfy the format + dimensions + file-size requirements together.
Use the SizeHex Image Resizer when exact pixel dimensions are required.
4. The Photo Gets Stretched
Changing width and height independently can distort the photograph.
For example, taking a 4:3 photograph and forcing it into a completely different shape can make people or objects appear unnaturally wide or narrow.
If you need a different composition, crop the photograph first.
You can use the SizeHex Image Crop Tool before resizing.
How to Reduce an iPhone Photo Without Losing Important Quality
A good optimization process looks like this:
Original iPhone Photo
↓
Check destination requirements
↓
Convert HEIC → JPG if necessary
↓
Crop unnecessary areas
↓
Resize to appropriate dimensions
↓
Compress gradually
↓
Check the final image
↓
Upload or share
This approach gives you considerably more control than simply applying maximum compression.
When Should You Convert HEIC to JPG?
Convert HEIC to JPG when the destination doesn't support HEIC or specifically asks for JPG/JPEG.
Examples include some:
- Online application forms
- Job portals
- Government websites
- Older software
- Document-management systems
- Websites with JPG-only upload fields
If the destination already supports HEIC and you don't need a JPG, there's no reason to convert the original just for the sake of conversion.
You can use the SizeHex HEIC to JPG Converter whenever a JPG copy is required.
When Should You Use PNG Instead?
PNG can be useful when the image contains sharp graphics, transparency, or text where you want to preserve lossless image data.
For ordinary photographs, however, JPG is often a more practical choice when the goal is a smaller file.
Think about the content first:
Photograph → JPG
Graphics/transparency → PNG may be appropriate
The correct format depends on how the image will be used.
What About WhatsApp and Email?
The optimization you need depends on the purpose.
For Email
Create a reasonably sized copy rather than sending a huge camera-original photograph unnecessarily.
Resize → Compress → Send
For WhatsApp
If you're simply sharing a photograph for normal viewing, an optimized copy can reduce unnecessary file size.
If the recipient needs the original file for editing or printing, preserve and share the original separately.
For Websites
Website images should generally be prepared according to their actual display dimensions.
An image shouldn't be several thousand pixels wide if it will only appear as a small image on the page.
Resize → Optimize → Upload
For Online Forms
Follow the exact requirements provided by the website.
For example:
JPG + 200 × 230px + under 50KB
All three requirements matter.
Should You Reduce Every iPhone Photo?
No.
If you're keeping photographs for your personal archive, editing, printing, or future use, you should generally preserve the original high-quality file.
Create optimized copies only when necessary.
A useful system is:
Original → Never overwrite
Optimized copy → Sharing/uploading
This protects your original photograph while giving you smaller versions whenever required.
A Practical Example
Imagine you have an iPhone photograph:
Format: HEIC
Dimensions: 4032 × 3024 px
File size: 4.2 MBYou need to upload it to a website that requires:
JPG
Maximum 100KBA sensible workflow would be:
Step 1
Convert the HEIC photograph to JPG using the SizeHex HEIC to JPG Converter.
Step 2
Crop the photograph if the website requires a particular composition.
Use the SizeHex Image Crop Tool.
Step 3
Resize the photograph to appropriate dimensions.
Use the SizeHex Image Resizer.
Step 4
Compress the resized JPG.
Use the SizeHex Image Compressor.
Step 5
Check the final file.
Confirm:
JPG ✓
Correct dimensions ✓
Below 100KB ✓
Good visual quality ✓
The final image is now ready for upload.
Don't Forget the Original
After creating your optimized image, don't delete the original simply because you no longer need it for the current upload.
Your original HEIC photograph may be useful later for:
- Printing
- Editing
- Cropping differently
- Creating another optimized version
- Uploading to a different platform
- Creating a higher-resolution JPG
Think of the optimized image as a working copy, not a replacement for your original.
Final iPhone Image Optimization Checklist
Before uploading or sharing an optimized iPhone photograph, check everything below:
- Format: Is the required format correct?
- Dimensions: Are the required width and height correct?
- File size: Is the file comfortably below the maximum?
- Quality: Is the image still clear?
- Aspect ratio: Does the photograph look natural?
- Orientation: Is it rotated correctly?
- Cropping: Is the important content visible?
- Original: Have you kept the original photograph?
If all eight checks pass, your image is ready.
Related SizeHex Tools
For the complete workflow:
Convert: SizeHex HEIC to JPG Converter
Crop: SizeHex Image Crop Tool
Resize: SizeHex Image Resizer
Compress: SizeHex Image Compressor
Convert formats: SizeHex Image Converter
Conclusion
Reducing an iPhone photograph doesn't have to mean destroying its quality.
The better approach is to create an optimized copy specifically for the destination.
If necessary, convert HEIC to JPG, crop unnecessary areas, resize the image to appropriate dimensions, and then compress it until it meets the required file-size limit.
The most reliable workflow is:
Convert → Crop → Resize → Compress → Verify
And remember one important rule:
Keep your original photograph and optimize a copy.
That way, you can create a 50KB, 100KB, 200KB, email, website, or sharing version whenever you need one—without sacrificing your original high-quality image.