August 26, 2026
JPG Size Comparison: What Affects JPEG File Size and Quality?
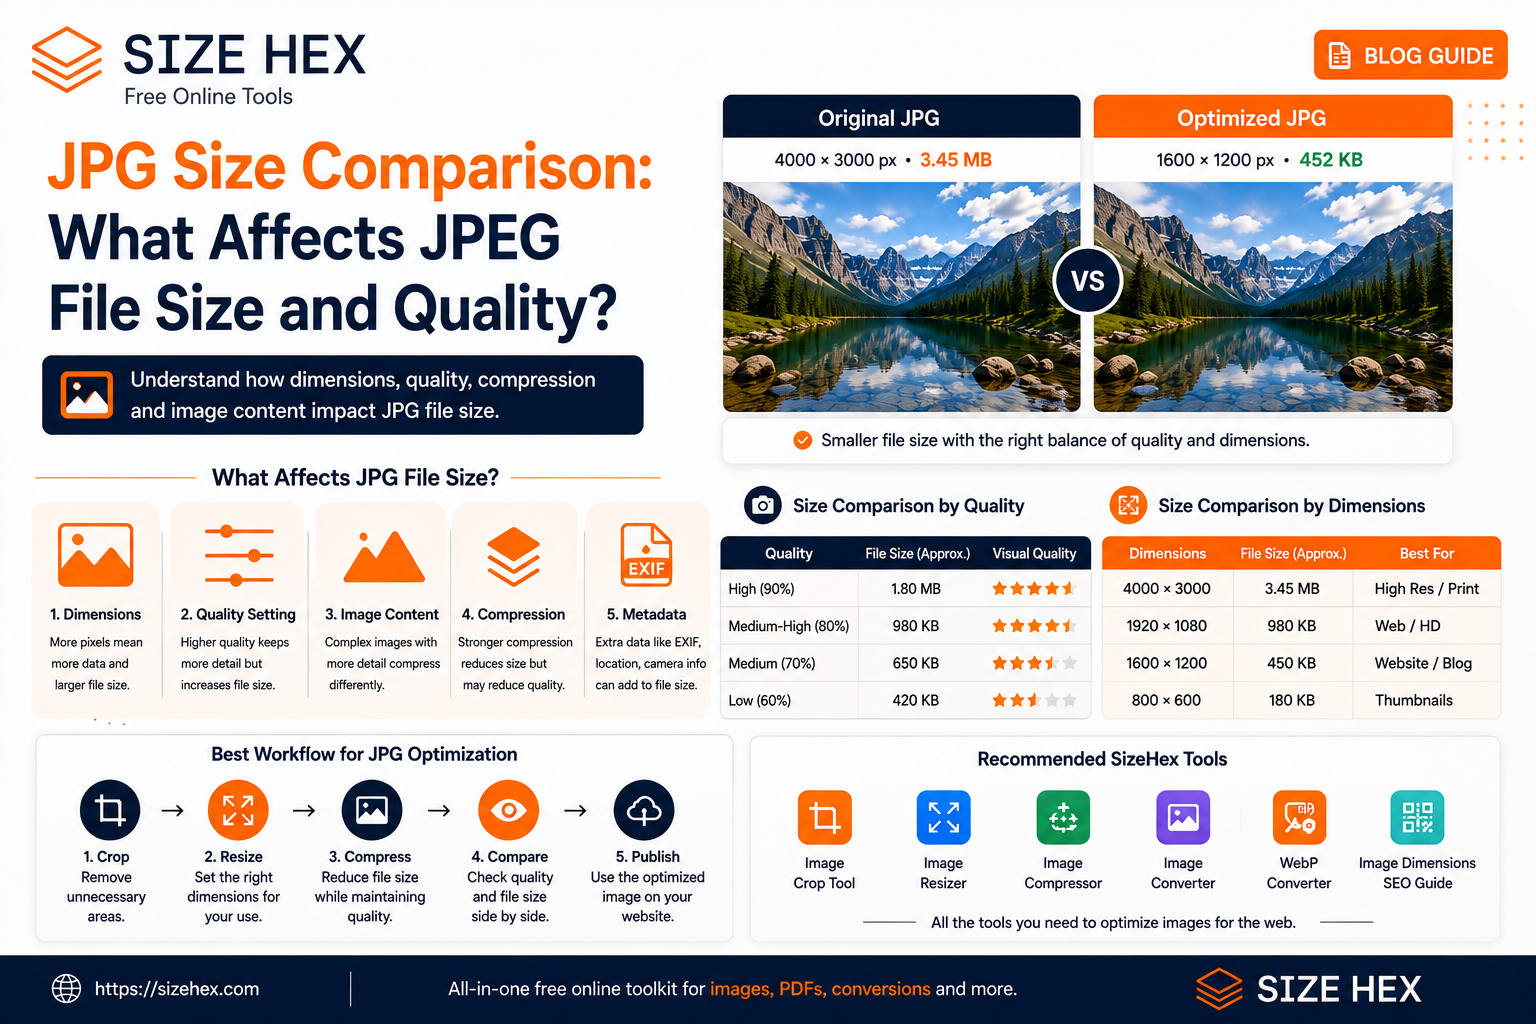
JPG Size Comparison: What Affects JPEG File Size and Quality?
Two JPG images can have exactly the same width and height but completely different file sizes.
For example, two photographs may both be 1920 × 1080 pixels, yet one could be a few hundred kilobytes while another is several megabytes.
Why does this happen?
JPG file size depends on much more than just the image's dimensions. The amount of visual detail, compression settings, image quality, metadata, and the way the file was originally created can all affect the final size.
Understanding these factors can help you choose the right JPG settings when preparing images for websites, social media, online forms, email, or storage.
What Is JPG File Size?
JPG file size refers to the amount of digital storage required by a JPEG image.
It is usually displayed in:
- KB (kilobytes)
- MB (megabytes)
For example:
500 KB = smaller file
3 MB = larger file
However, file size alone does not tell you whether an image is good or bad.
A larger JPG may contain more visual detail, while a smaller JPG may have stronger compression or lower dimensions.
The goal is to find an appropriate balance between file size and visual quality.
Why Do JPG Images Have Different File Sizes?
Several factors influence the size of a JPG file.
The most important ones are:
1. Image Dimensions
Pixel dimensions are one of the biggest factors.
A 4000 × 3000 pixel image contains significantly more pixels than an 800 × 600 image.
For example:
4000 × 3000 → 12 million pixels
800 × 600 → 480,000 pixels
Even before compression is considered, the larger image contains much more visual information.
This is why resizing an image can be an effective first step when reducing file size.
If you need exact dimensions, you can use the SizeHex Image Resizer.
2. JPG Quality Setting
The quality setting used when exporting or compressing a JPG can have a major effect on its file size.
Higher quality generally preserves more image detail but can produce a larger file.
Lower quality usually produces a smaller file but can introduce visible compression artifacts.
For example, the same photograph might produce noticeably different file sizes at different quality settings.
The exact result depends on the image and the encoder being used.
This is why there is no single JPG quality percentage that is perfect for every image.
3. Image Content
The actual content of the photograph also matters.
A photograph containing:
- Trees
- Grass
- Hair
- Buildings
- Textures
- Fine details
- Complex backgrounds
may compress differently from an image containing a large area of a single color.
Two images with identical dimensions and the same JPG quality setting can therefore have different file sizes.
4. Compression
JPG uses lossy compression to reduce file size.
During compression, some image information can be discarded to produce a smaller file.
The stronger the compression, the greater the potential reduction in file size.
However, excessive compression can create:
- Blurry details
- Block-like artifacts
- Loss of fine textures
- Color changes
- Jagged edges
The ideal compression level depends on how and where the image will be used.
If you want to reduce the size of an existing JPG, you can use the SizeHex Image Compressor.
5. Metadata
JPG files can contain additional information such as:
- Camera information
- Date and time
- Location information
- Software information
- Color profile data
Depending on how the image was created and processed, metadata can contribute to the overall file size.
For ordinary web images, unnecessary metadata may sometimes be removable during optimization.
JPG Dimensions vs File Size
It is important to understand that dimensions and file size are not the same thing.
Dimensions tell you how many pixels the image contains.
File size tells you how much storage the encoded file requires.
For example:
| Image | Dimensions | Possible File Size |
|---|---|---|
| Small photo | 800 × 600 | Smaller |
| Medium photo | 1600 × 1200 | Larger |
| Large photo | 4000 × 3000 | Much larger |
These are only general examples. Actual JPG sizes can vary considerably depending on image content and compression settings.
This is why simply looking at pixel dimensions isn't enough when optimizing images.
Why the Same JPG Can Have Different File Sizes
Imagine you have two photographs:
Photo A
1920 × 1080
Simple background
Moderate detail
Photo B
1920 × 1080
Dense foliage
Fine textures
Complex background
Both images have exactly the same dimensions.
However, their JPG file sizes may be very different after compression because the visual information contained in each image is different.
This is one reason why JPG size comparisons should ideally be performed using the same image, same dimensions, and controlled quality settings.
How JPG Quality and Dimensions Affect File Size
When comparing JPG file sizes, it is important to change one factor at a time. If you change the image dimensions, quality, format, and compression settings simultaneously, it becomes difficult to understand what actually caused the file size to change.
A controlled comparison makes it easier to choose the right settings for your particular use case.
JPG Quality vs File Size
The quality setting is one of the most important factors when exporting or compressing a JPEG image.
As the quality level decreases, the encoder generally removes more image information, which can reduce the file size.
However, the relationship isn't perfectly predictable.
For example, changing a JPG from 90% quality to 80% doesn't mean the file will always become exactly 10% smaller.
The final result depends on the image itself.
A photograph with a simple background may respond differently to compression than a photograph containing detailed textures, foliage, buildings, or other complex elements.
A Practical Quality Comparison
Instead of choosing a quality setting blindly, create several versions of the same image and compare them.
For example:
| Version | Quality | Expected Result |
|---|---|---|
| A | High | Larger file, more preserved detail |
| B | Medium-high | Good balance for many uses |
| C | Medium | Smaller file, more compression |
| D | Low | Very small file, possible visible artifacts |
These aren't universal quality recommendations. The best setting depends on the image and its intended use.
The important point is to visually inspect the result instead of optimizing only for a number.
How Image Dimensions Affect JPG Size
Reducing the pixel dimensions of an image can often have a significant effect on its file size.
Consider a photograph that is:
4000 × 3000 pixels
Its total pixel count is:
12,000,000 pixels
Now compare it with:
1600 × 1200 pixels
That's:
1,920,000 pixels
The second image contains substantially fewer pixels.
If the image is going to be displayed at around 1600 pixels wide, delivering the original 4000-pixel version may be unnecessary.
This is why resizing can be an important part of image optimization.
You can use the SizeHex Image Resizer when you need to create specific pixel dimensions.
JPG Compression vs Resizing
Resizing and compression solve different problems.
Resizing
Reduces the number of pixels.
Compression
Reduces the amount of data used to represent those pixels.
Using both together can often produce a much smaller final image than relying on compression alone.
For example:
Original
4000 × 3000
Large file
↓
Resize
1600 × 1200
Fewer pixels
↓
Compress
Optimized JPG
Smaller file
This is often a more practical workflow than aggressively compressing a very large image.
How to Compare JPG File Sizes Correctly
If you want to perform your own JPG size comparison, keep the test controlled.
Use the same:
- Original image
- Pixel dimensions
- JPG format
- Color profile where practical
- Quality settings
Then change only the factor you are testing.
For example, if you're testing quality:
90% → 80% → 70% → 60%
Keep the image dimensions unchanged.
If you're testing dimensions:
4000px → 2500px → 1600px → 1200px
Keep the quality setting consistent.
This makes the comparison much more meaningful.
What JPG File Size Is Good for a Website?
There isn't one universal JPG file-size limit that applies to every website.
A hero image, product photograph, thumbnail, blog image, and small icon can all have very different requirements.
Instead of targeting an arbitrary number, consider:
- Display dimensions
- Image quality
- Network conditions
- Image position on the page
- Device type
- Importance of the image
- Overall page weight
A large hero photograph may reasonably be larger than a small thumbnail.
The important goal is to avoid sending significantly more image data than the page actually needs.
Example: Optimizing a Large JPG
Imagine you have a photograph that is:
4000 × 3000 pixels
and has a file size of several megabytes.
The website only needs the image at:
1200 × 900 pixels
A sensible workflow would be:
- Resize the image to an appropriate dimension.
- Save or convert it as JPG.
- Compress it using a suitable quality level.
- Compare the resulting file with the original.
- Check the image at its actual display size.
- Use the optimized version if the quality remains acceptable.
You can use the SizeHex Image Compressor for the compression step.
Don't Judge JPG Quality at 100% Zoom Only
An image may look slightly different when viewed at 100% zoom but still look excellent at its actual website display size.
For example, if an image is displayed at 800 pixels wide, evaluating a highly enlarged version may exaggerate small compression differences that visitors will never notice.
Always check the image at approximately the size at which users will actually see it.
When Should You Stop Compressing?
You should stop when additional compression starts creating noticeable quality problems.
Watch for:
- Blocky patterns
- Blurred textures
- Loss of fine details
- Strange edges
- Color banding
- Visible artifacts around text
If reducing the file size further makes the image noticeably worse, the additional savings may not be worth it.
The goal is efficient compression, not maximum compression at any cost.